Creating and sharing Educational videos lets classrooms communicate better than ever before; sharing ideas more easily and across boundaries using the power of the Internet. Following the right steps, you can easily learn how to make these types of video too.
This how to guide goes step-by-step through the scripting, filming, editing and sharing of an educational video. Both students and teachers appreciate that understanding is paramount, and when a method is available that offers better memory retention and is faster than reading – though online video – the opportunity is a must.
Outcomes of This How-To Guide for Students (and Teachers)

By reading this how-to guide, you will have the overview of how to make your own educational video, the steps and tools involved, and how to share your video online. This guide is laid out in sequence for both students and teachers, with explanations and examples for students as they embark on their first educational video assignment. At the end of each section are tips specifically for teachers and students, to ensure they:
- Follow the steps of video production for successful video creation
- Understand how the main concepts in editing a video
- Learn the concepts of shooting with a video camera
- Upload a video to YouTube to be shared
- Resources for finding music for use in production
- Downloadable Templates for Scripting, Storyboarding, and More
Bridging The ‘Brick-And-Mortar' Classroom with Online Learning
Teaching in stage, moving into deeper complexity as concepts are understood works in classrooms, online courses and books. In this knowledge transfer process, teachers and student learners are bound together in this exchange as they cooperatively attempt to communicate effectively and understand and memorize new concepts.

Today, available to everyone is a solution that helps us teach and learn even more effectively. The tools and know-how, as in this guide, is available for students and teachers inside and outside the classroom. While face-to-face is the ideal option, it's often not available, and we can embrace new learning opportunities.
Why is Learning, Teaching and Understanding, So Hard?
Learning new concepts can be difficult. If learning was easy for everyone, then one in-depth book for each subject would be enough. Self-directed learning would be king. There would be no need for classrooms, schools or instructors. Just a book for each topic.
But learning usually doesn’t happen this easily, as students can often get lost with a new concept. Ideally, with careful consideration for learners, an instructor teaches using concepts and words a student already understands to translate and explain a new idea. Periodically, a new word or idea is introduced that conveys a new meaning. Using this language progression, the process continues forward as the instructor goes into the topic, building deeper understanding all the way along.
Why Use Video as a Teaching and Learning Tool?
Informing effectively and keeping learners engaged is critical during the information transfer process. Today, the best technology tool for effective distance-teaching is using educational video. Video is also used as a supplement in the classroom. Well-made video captivates and communicates effectively as it is multi-sensory, using both visual and auditory senses. Being able to see and to hear a concept being demonstrated is far more effective than a new learner simply reading text and trying to visualize the concept mentally.
Watching a demonstration ‘live’ on video reduces the ‘cognitive load’, or amount of mental work. Video is simple and allows the mind to easily grasp a new concept and commit the idea to memory.
Effective teachers are aware that students need the most support just as they are initially being introduced to a new idea. Similar to how good promotional videos communicate concepts successfully, teachers use educational video’s ability to captivate interest and enhance student learning and supplement concepts being taught in the classroom.
How Does Video Work to Make Learning Better?
Learners and instructors alike prefer video compared to reading and writing methods, as video verbally explains and visually illustrates at the same time. Used both inside and outside the classroom, video is ideal for the process of transferring ideas to be understood. Being more engaged when the learning occurs leads to more effective memory recall, and concept is retained more easily than with many other mediums.

Video is a prime example of ‘multi-modal’ learning, or, multiple communication methods at the same time (Lazear, 2008). With the powerful combination of simultaneous visual and auditory learning and due to ‘picture superiority effect’, visual memories are given far more importance than verbal, or word memories (Nelson, D.L., 1976).
The Benefits of Video with Learning and Recall:
- Video is Easier to Comprehend than Verbal Instruction. Well-planned and produced videos enhance comprehension and retention of information when compared to traditional “reading and writing” methods.
- Video is a Textbook Example of ‘Multi-Modal Learning”. With visuals, text, and speech, educational video offer multiple methods of information delivery and simultaneously increases engagement and ability to understand (Lazear, D. 2008).
- Video Increases Memory Recall due to ‘Dual Coding Theory’. Because humans' memory is recorded as either pictorial or word-based, educational video greatly increases recall ability of both due to it’s synchronized visual and verbal associations (Paivio, A. 1921).
The Value in Assigning Students to Make their Own Educational Videos

Competency-based learning is demonstrated by students when a class is assigned the task to make and share their own educational videos. The hands-on aspect of researching, filming and editing video gives students the ability to demonstrate both their technical communication competencies as well as detailing the topic they are persuasively reporting on.
Educational video is a perfect fit with increasingly popular online education options, and with mass online courses, travel is no longer an issue. Students can be away from the classroom and using an iPhone with the iMovie app and can create their own educational videos and then share and view each other’s video assignments over the Internet. Students can watch and report their classmate’s videos as well, all this occurring outside of valuable classroom time.
The 3 Points of Educational Video Production
By following the correct steps of video production, in the proper order, students and teachers alike will be able to create successful educational videos. Today, video does not have to be difficult to create, and it doesn’t have to be expensive either. The iMovie app for Apple products, (for either the Mac or an iOS mobile device such as iPhone), will work very well. Thanks to the advances in technology, cameras, microphones and editing apps are easy to acquire and use – an iPhone is all that’s needed to create a professional looking video today.
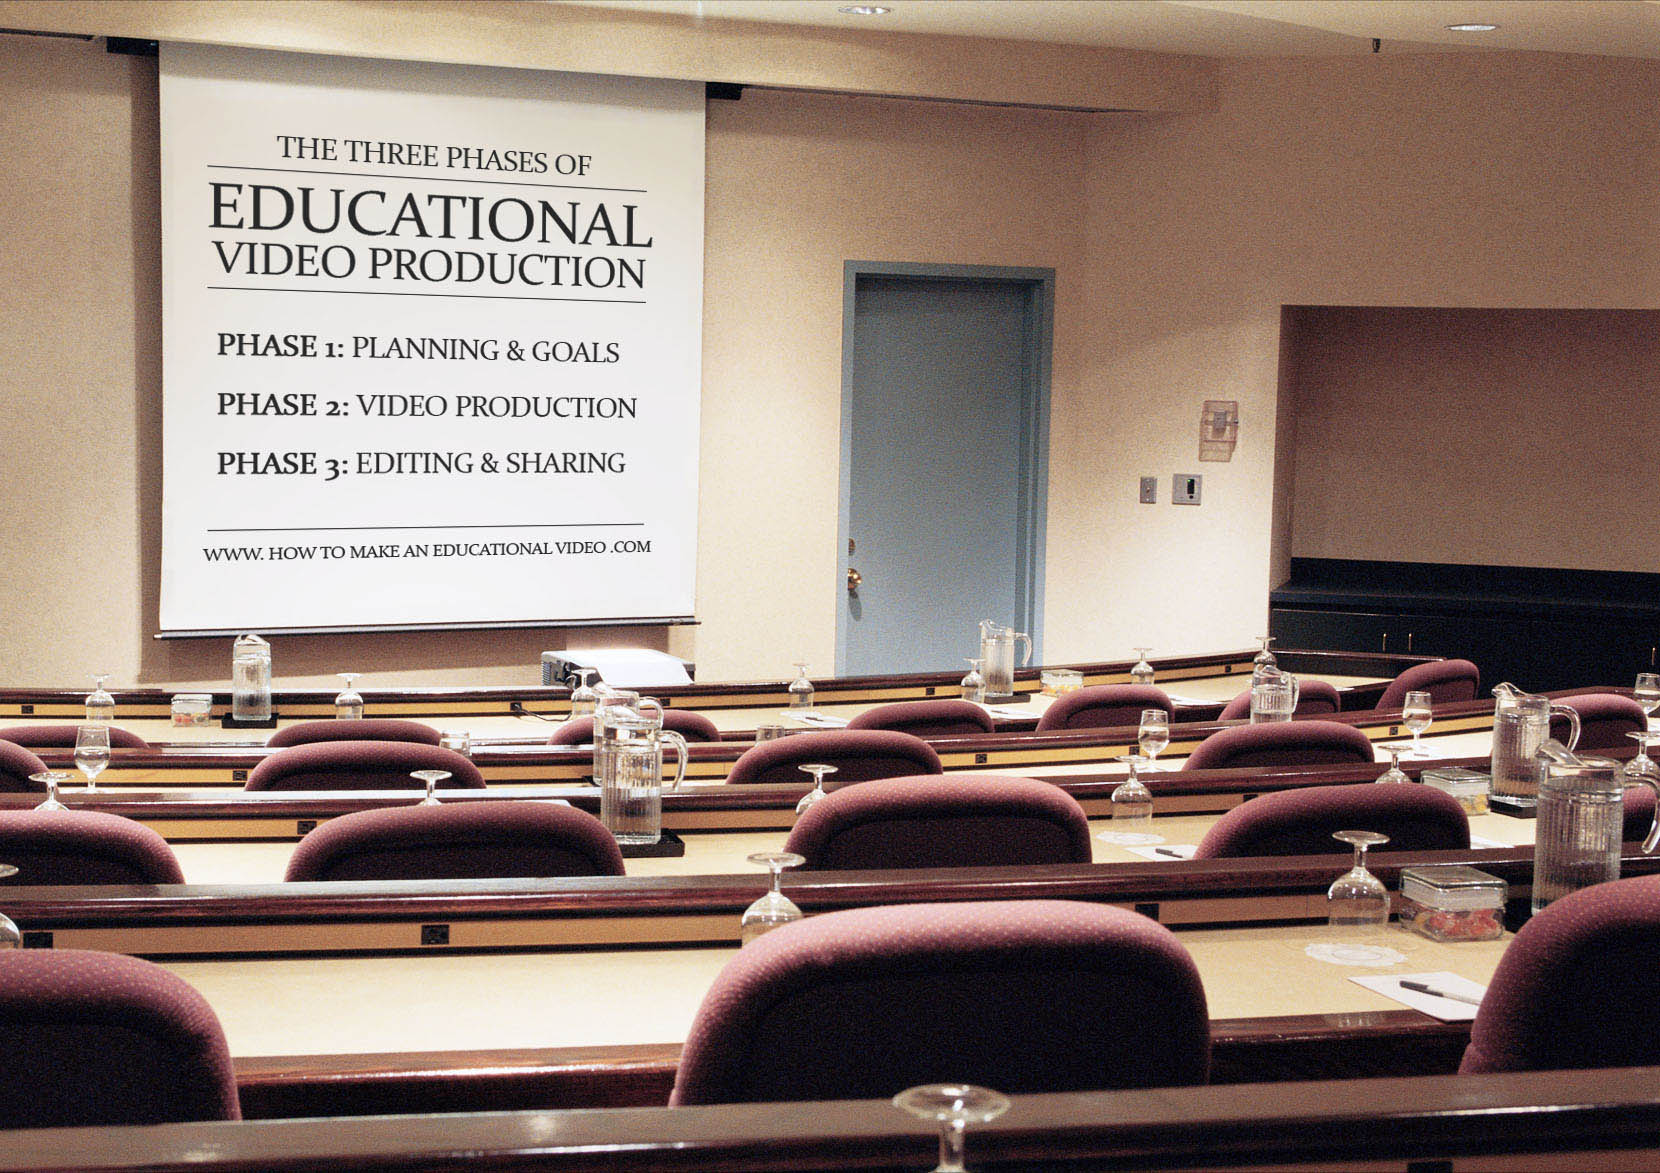
- Planning and Goals, Phase 1: Identify the key message, goals, style, audience, script, storyboard and the purpose and strategic steps to communicate the message. These are governed by use of a creative brief, script and storyboard.
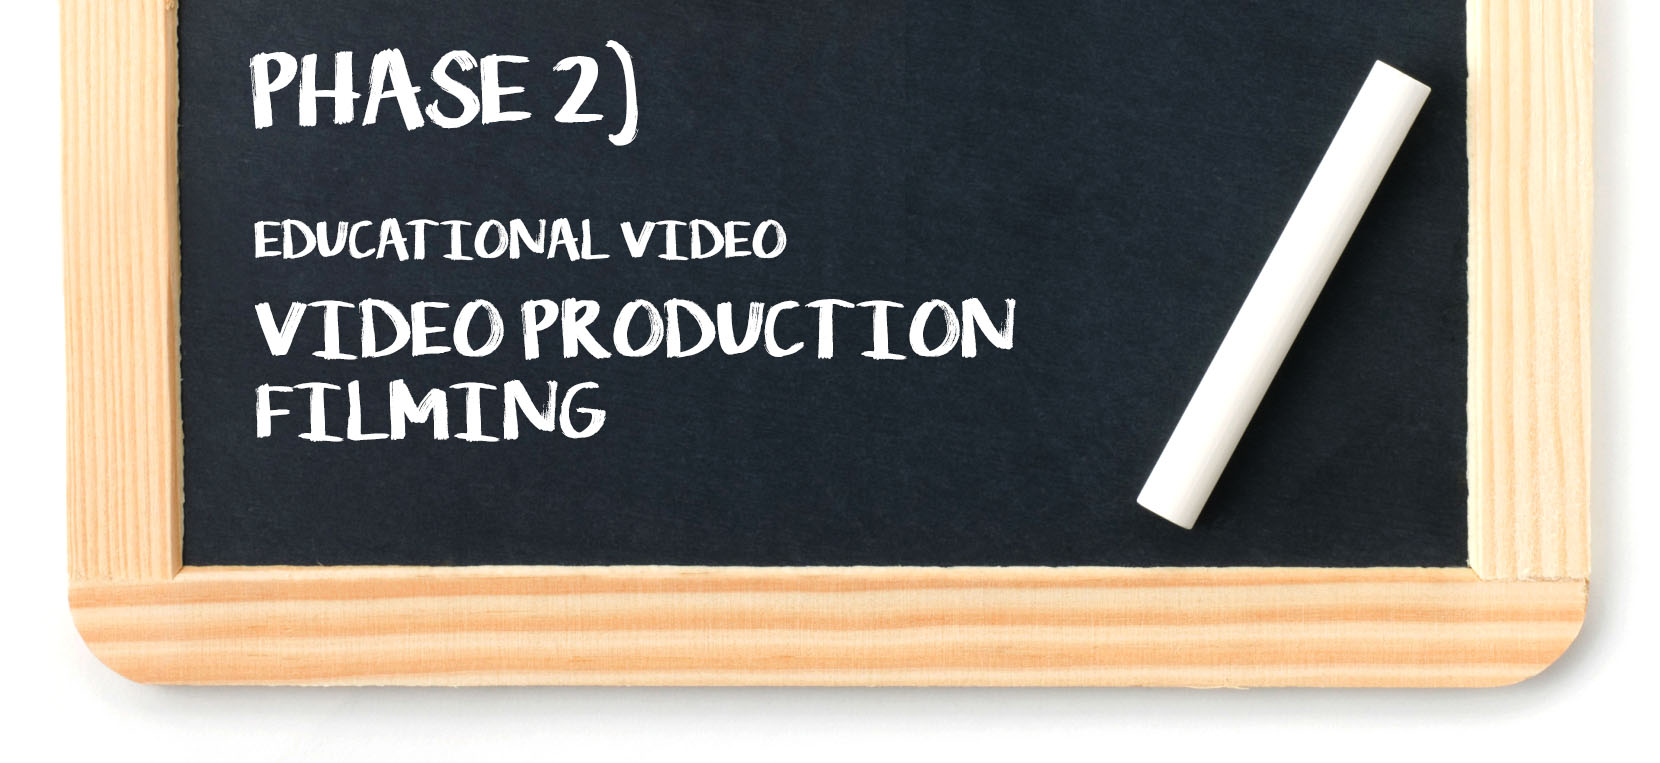
- Video Production, Phase 2: Planning the pre-production technical aspects to creating and filming, the video production filming days, and editing and fine-tuning the visuals and sound in post-production.
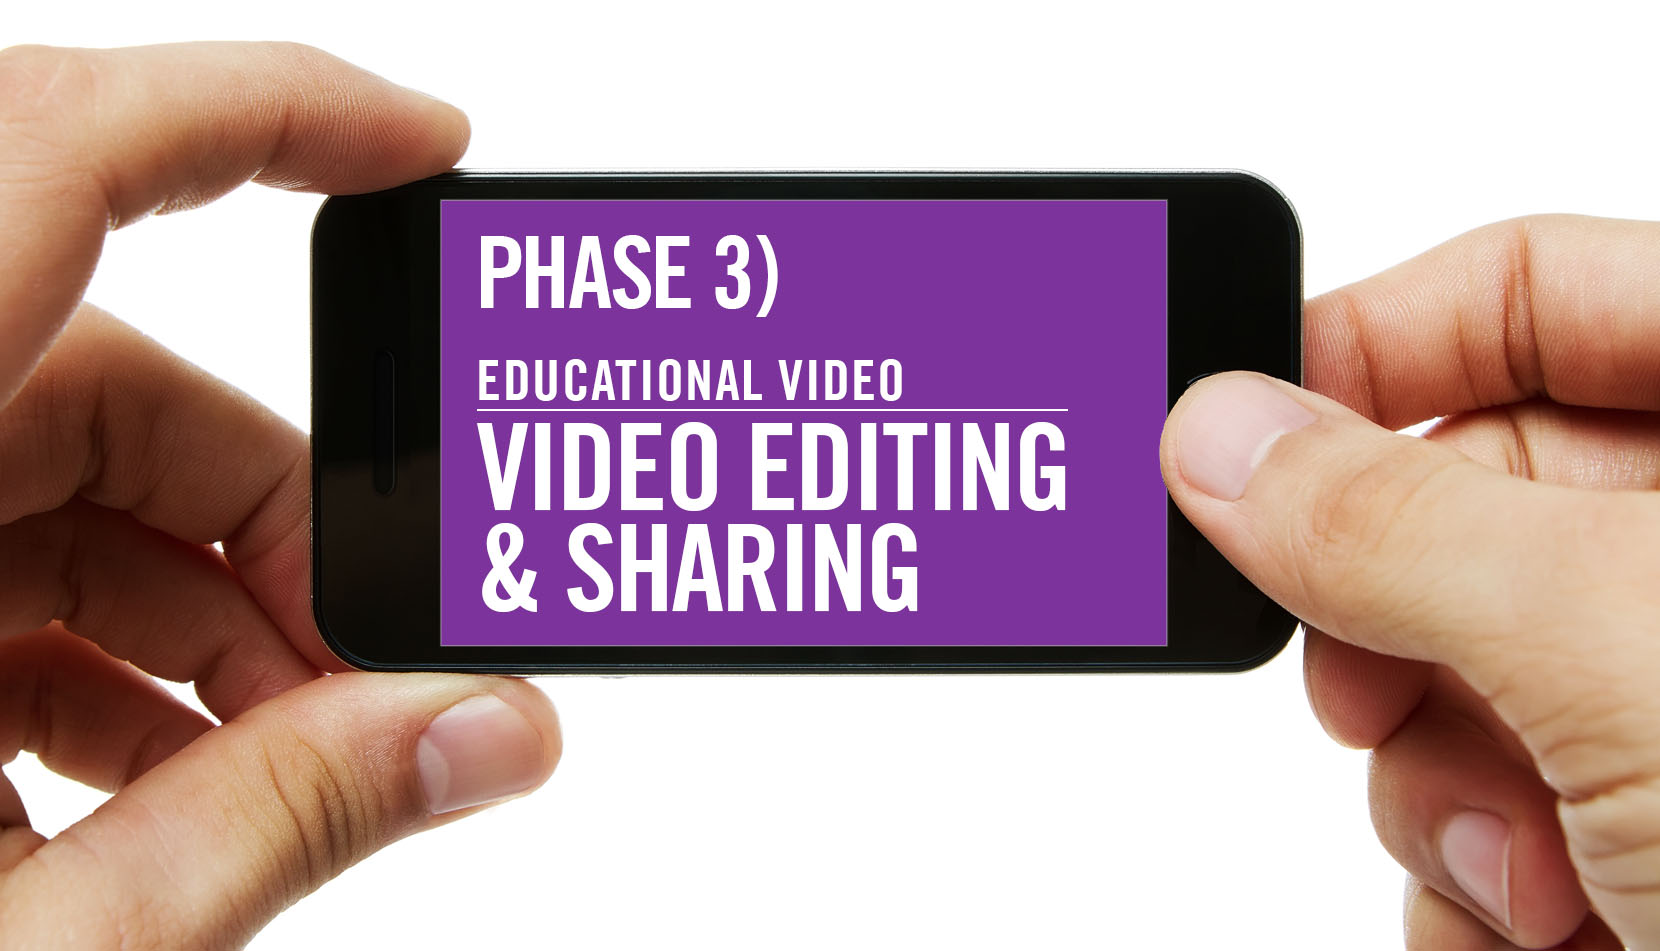
- Editing and Sharing, Phase 3: Distribution, social sharing, video search-engine-optimizations and analytics.
By following the correct steps of video production, in the proper order, students and teachers alike will be able to create successful educational videos.
Start Making Your Education Video
You can make your own video, but the first question you have to ask yourself is this:
“What should your viewers think or do after they watch your video?”
The answer to this question is crucial to know before any other steps happen. To be said another way, what is the ‘point’ of your video?
The answer to this question will define everything else you do in this with this project; the script, the shots, the people, the graphics, the music and where the final edit is shown.
If a student was making a video to show classmates how a particular change in signage affected pedestrian flow in a public building, then the student would be no reason to interview a grandparent asking them about their childhood studying habits. Planning main details upfront is key, and is done through a few specific worksheets, covered next.
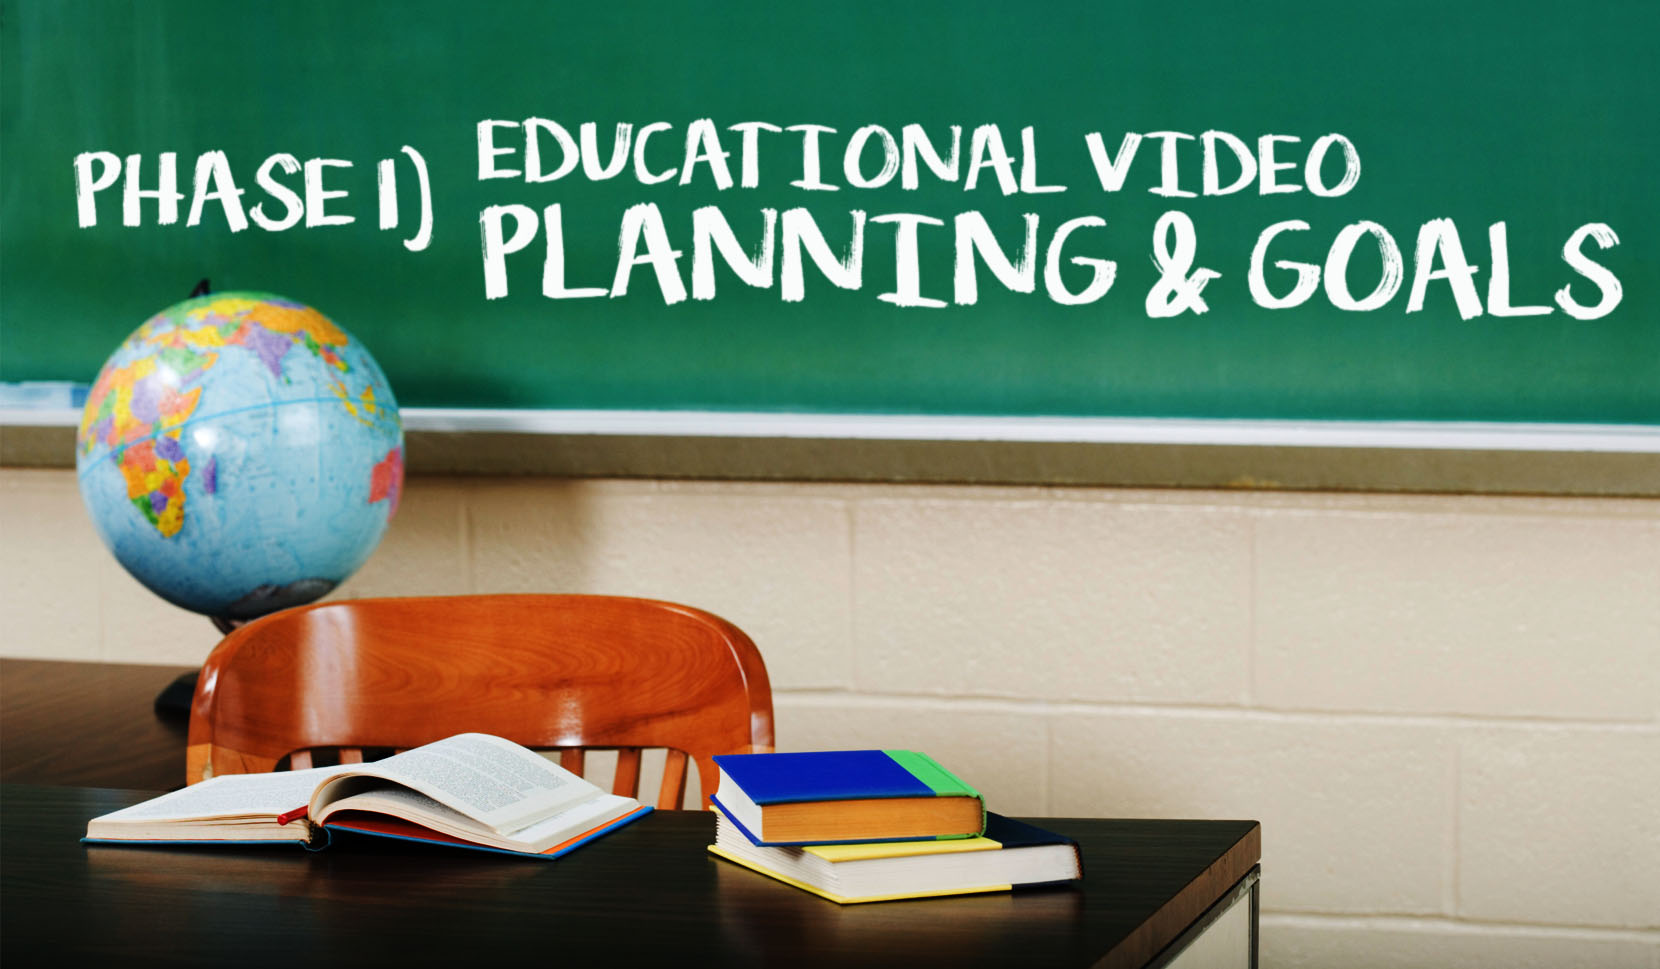
Point 1: Educational Video Planning and Goals
What’s the point of a video if it doesn’t communicate effectively? If a viewer watches a video and doesn’t understand the message or the video production process is untidy and unprofessional, all the time put into the project is wasted – a scenario best avoided!
Good news, there are tools that exist that ensure a video will work as intended. From inception phase and finding meaning to the action phase with the structure of video production and storytelling (T. Pychyl, 2010). Planning and picking the audience and goals for the video aren’t hard, but, does require a little a brief period of focus. The upside is, the more time you concentrate on planning, the less work you have to do later.
The Most Important Step
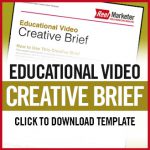
The first step is to use an educational video Creative Brief – a special questionnaire designed specifically for video production, and answer all the questions in full before you begin. The creative brief defines the key message, the audience, the goals, and other key aspects to make an educational video.

The message to the audience should also be clear and concise – you can’t speak to absolutely everyone, so you must decide who your main audience is upfront. Your language and topics will be focused when you have an audience in mind – be conscious of not using terminology if you’re choosing an audience that is unfamiliar with the terms.
The Main Message
How does the Creative Brief work.
- What is the one Main Message?
- Who is your Primary Audience?
- What is the One Action the Viewer Needs to Take?
- And a few more questions…
 The Creative Brief will give more detail, but in short, the main message should just be one idea. Keep to one learning objective for a video. It should be very clear so that when the video ends, the audience can easily speak to what the topic was about with confidence. If you have multiple ideas you want to get across, it is best to break those ideas up into separate videos, so rather than having a single 6-minute video with 3 messages, make three 2-minute videos with one idea each. Shorter is better, and each video will be a full complete message per video.
Download Your Own Educational Video Creative Brief Template Here
Similar to the one main message, the viewer needs to know what action they’re being asked to take. If this were a promotional video, this step would identify what the “call to action” is. Is it to learn more about this topic by visiting a resource website? Or is it to write their local congressperson to challenge about a certain law? Using your Creative Brief will help you narrow down your message, audience, tone, duration and call to action step.
![]() Tips for Students: Spend as much time on the Creative Brief as is needed – this document will provide the outline for the core goals of your project, and you can always refer back to it when you’re unsure how to proceed. It’s a very necessary step for a successful educational video!
Tips for Students: Spend as much time on the Creative Brief as is needed – this document will provide the outline for the core goals of your project, and you can always refer back to it when you’re unsure how to proceed. It’s a very necessary step for a successful educational video!
![]() Tips for Teachers: Have your entire classroom complete a Creative Brief and review these before production begins to ensure that the proper direction will be taken. Once you have reviewed and approved your student’s Creative Briefs, have your students complete a series of Storyboards as the next task – and review these too.
Tips for Teachers: Have your entire classroom complete a Creative Brief and review these before production begins to ensure that the proper direction will be taken. Once you have reviewed and approved your student’s Creative Briefs, have your students complete a series of Storyboards as the next task – and review these too.
Choose your Style of Educational Video
You've decided to make a video, now it's time to choose which style; ‘talking-head' style where a presenter is on screen being recorded talking, or imagery and voice over only, (photos and or images and text with a narrated voice speaking the message), or a imagery and text only, and no voice over.
Traditional (Full Featured) Educational Video
Can feature all available elements; a-roll, b-roll, photos, graphics, text, voice and narration.
Imagery and Narration Voice-Over Educational Video
The most simple way to think of this video style is that there will be no on-screen person presenting and speaking to the camera.
Imagery and Text Only Educational Video
Here is an example of a video for MIT – text and imagery (stills, animations and b-roll video) with music, and no voice-over at all.
Script Writing for Educational Videos
A script is often referred to something like a blueprint for filmmaking – it’s the plan that flows from the Creative Brief and carries the actual story. In addition, a script saves you a lot of time in editing and filming. When filming, it’s not always necessary to memorize word for word, but as an outline that gets you to the end goal, a script is invaluable.
Format of a Video Script

Typically professionally formatted scripts, similar to a Hollywood screenplay, have a similar flow or style to them. This consistent style is done because it works – in addition to spoken word, character names, scenes location, motivations and actions are all listed. There is also plenty of white paper space on the page that is ideal to use a pen to write cues and notes on.
Script Duration vs. Video Duration
The basic rule of thumb is that one page of ‘properly script formatted’ text is about one minute of on-screen camera time. So a two-page script should be approximately 2-minutes for the educational video.
“ … [no matter what video topic] the rule of thumb will be make [your video] as short as possible.” (Hornung, 2014)
This rule is important to be aware of because for online video, shorter is better. Longer videos are ignored because viewers’ attention spans are short, and so if an idea can be conveyed easily with a short video, it’s all that’s needed.
![]() Tips for Students: Try and use a traditional script format if you can – it will help for timing and reading. Try reading your script out loud, speaking slowly, and time yourself to get a sense of how long your video might be. Usually scripts take longer to read than you think – time yourself to see!
Tips for Students: Try and use a traditional script format if you can – it will help for timing and reading. Try reading your script out loud, speaking slowly, and time yourself to get a sense of how long your video might be. Usually scripts take longer to read than you think – time yourself to see!
![]() Tips for Teachers: A general rule of thumb for online video is shorter is better. 1:00 to 3:00 is a suitable duration for most educational videos before the viewer’s attention is lost. If a video is in the 5:00 – 8:00 range, there should be a special reason. Again, shorter is better.
Tips for Teachers: A general rule of thumb for online video is shorter is better. 1:00 to 3:00 is a suitable duration for most educational videos before the viewer’s attention is lost. If a video is in the 5:00 – 8:00 range, there should be a special reason. Again, shorter is better.
Visual Storytelling with a Storyboard
With your creative brief now printed off and filled out, completed and in-hand, the next step for you is to visually plan out individual shots using a storyboard template. A storyboard is a page with several blank boxes that represent individual shots or ‘frames’ from your promotional video. Each frame, or panel, represents an individual shot – comic books use this method to tell a story in sequence.

Storyboard to Visually Illustrate Shots
- Where is the location setting? (inside vs. outside)
- Which subjects are in frame, and which way are they facing?
- What type of shot (close up, wide angle, extreme close up, etc.)
- Where is the camera in the scene and how close is the subject?
- Is there movement? Is the subject moving, or the camera?
Using a pencil, lightly sketch on printed storyboard and draw out the plan for the shots you have in mind. Feel free to add notes below each frame, for instance “Opening shot, actor walks up to camera.” With pencil, you can adjust the shots as you work through your script.
How Long Does is it to Make Video?
Educational video production and planning varies with the scope of the project. Much time should be spent on the planning and preparation to ensure the video is a good result.
- First Week's Assignment: Creative Brief
- Second Week's Assignment: Script and Storyboard
- Third Week's Assignment: Shooting and First Draft Edit
- Fourth Week's Assignment: Review, Re-Edit and Upload the Video
When first assigning an educational video assignment to a class, the first step is to have the room individually (or in groups) complete the creative brief and submit it to the instructor for feedback. When the teacher gives back the creative brief with feedback, next, the storyboard and script should be created. Again these are submitted to the teacher for feedback. When these are all complete – creative brief, script and storyboard, the video is ready to be filmed.
![]() Tips for Students: Get as much feedback as possible! When you have your instructor read through your creative brief, script and storyboard, they'll make notes and have questions that are there for a reason. If they cannot easily understand the concepts of what you've written down, then it's likely that your video won't make sense either. This feedback is helpful as it will help clarify the end video.
Tips for Students: Get as much feedback as possible! When you have your instructor read through your creative brief, script and storyboard, they'll make notes and have questions that are there for a reason. If they cannot easily understand the concepts of what you've written down, then it's likely that your video won't make sense either. This feedback is helpful as it will help clarify the end video.
![]() Tips for Teachers: While you could assign a video assignment without viewing your student's creative briefs, scripts or storyboards, it is possible that some may not understand the scope of the project or how to best communicate their ideas. If you have the time, staggering the assignments – creative brief first, script second and storyboard third, will set up your class for the best success possible.
Tips for Teachers: While you could assign a video assignment without viewing your student's creative briefs, scripts or storyboards, it is possible that some may not understand the scope of the project or how to best communicate their ideas. If you have the time, staggering the assignments – creative brief first, script second and storyboard third, will set up your class for the best success possible.
Popular Film Shot Types List
- CU – Close Up
- MCU – Medium Close Up
- ECU – Extreme Close Up
- WS – Wide Shot
- EWS – Extreme Wide Shot
The step of working with a storyboard is called pre-visualization in the professional film making world, and will help a lot before you go to shoot your educational video.
![]() Tips for Students: There is no hard-set rule for how many frames of storyboard a video should have, but think like a video editor when planning your shots. A good rule of thumb is to ‘start wide’ and move in. An establishing shot (to show the location your video is starting at) is usually a ‘WS’ or ‘EWS’ to show the building or location the video starts at. Usually a ‘MCU’ or ‘CU’ of the person speaking on camera is shown soon after.
Tips for Students: There is no hard-set rule for how many frames of storyboard a video should have, but think like a video editor when planning your shots. A good rule of thumb is to ‘start wide’ and move in. An establishing shot (to show the location your video is starting at) is usually a ‘WS’ or ‘EWS’ to show the building or location the video starts at. Usually a ‘MCU’ or ‘CU’ of the person speaking on camera is shown soon after.
![]() Tips for Teachers: Like the Creative Brief and later the Script, your students’ Storyboards should be reviewed by you prior to filming the educational video so that you can ensure that they are on the right path. Catching errors at this stage prior to filming will help save time for everyone involved!
Tips for Teachers: Like the Creative Brief and later the Script, your students’ Storyboards should be reviewed by you prior to filming the educational video so that you can ensure that they are on the right path. Catching errors at this stage prior to filming will help save time for everyone involved!
Point 2: Educational Video, Production, Filming and Editing
You are almost ready to begin the actual video production. In preparation for filming or shooting, make sure you have a list of the on-screen interviewees, the props, the filming equipment and access to all the locations you need.
Make these lists are complete and then bring together all the gear you need and lay it out in front of you first, to make sure it all works. There’s nothing worse than showing up to a location to film only to realize your camera has no more storage memory to film and you need to make space first, or your forgot that script or tripod at home. It happens to the best of us, let me assure you, but the list and preparation will help.
Educational Video Gear Checklist

Like a painter with their set of paintbrushes, using video gear is an exciting step for most people, as this is the phase where we’re actually ‘creating’. While there is no one size fits all, having a guide for gear will help narrow down what is required to make a video.
Essential Video Production Gear
- Camera (iPhone, DSLR, or Video Camera)
- Tripod (many tripod options)
- Computer (MacBook Pro, iMac or other computers)
- Microphone (Wired or Wireless)
- Headphones (over-ear with muffs to avoid background noise)
The above list is from a guide titled ‘What Video Equipment Do I Need for Any Budget Level’. The article does a side-by-side comparison of low budget, medium budget and high budget gear (click here to see it).
For basic educational videos, the ‘Low Budget’ gear list should be helpful to beginning video producers, but there are bits of gear from a higher-end budget that you may be able to borrow and add to your video to enhance it.
Additional Gear: Lighting, Audio, Etc
- Camera Light (clips onto the camera and shines on people being interviewed)
- 3-Piece Lighting Kit (lights on stands, usually 2 or 3 lights placed around a subject)
- Audio Recorder (Can be used to record better sound than the camera does)
- Laptop (to backup the video)
Choosing the Best Place to Film

Check the area you plan on filming being conscious of ambient sound and lighting. Try and find an area that offers the least amount of background noise, and lighting, as you’d like it. For lighting, if you were bringing your own lights and stands, you’d want a place that you can control (turn off or on) other room lights. If you’re planning on using ambient light, take out the camera up and take a peek.
Video Filming Day

Filming your education video is fun and exciting! This is the moment where you get to make the concept that you’ve planned come to life. Make sure you have printed hard copies of all your lists, copies of your script, creative brief, and storyboard. Double check your gear, and arrive early to the location you’re planning on filming at. But first, an important note:
Special Note: You don’t want any reason to have to stop filming when you start if it’s avoidable. The common (avoidable) culprits are when cameras fill up their storage space or running out of power. It happens. Bring extra batteries, chargers, cables, and memory cards (or laptop or hard drive), just in case.
![]() Tips for Students: To increase production value of your video, use a tripod, a microphone, and lights. Tripod keeps the camera stable, the microphone picks up the sound better than the microphone on the camera, and the lights allow the camera to see the person being interviewed better than background light. These three elements are what the pros focus on to create great looking video.
Tips for Students: To increase production value of your video, use a tripod, a microphone, and lights. Tripod keeps the camera stable, the microphone picks up the sound better than the microphone on the camera, and the lights allow the camera to see the person being interviewed better than background light. These three elements are what the pros focus on to create great looking video.
![]() Tips for Teachers: Most often, sound is overlooked for beginners creating videos. Show your students examples of video where there is background music, or background noise that makes it hard to hear the narrator. If there is an option for your students to use a wired or wireless microphone when they are filming, have them use it for better results.
Tips for Teachers: Most often, sound is overlooked for beginners creating videos. Show your students examples of video where there is background music, or background noise that makes it hard to hear the narrator. If there is an option for your students to use a wired or wireless microphone when they are filming, have them use it for better results.
Some Educational Video Filming Tips:
- Make sure the camera is level, and focused properly on the subject. Each time you press record, it’s good to check that audio is good, and that the focus is correct.
- Each time you press “record” on the camera, say aloud “Rolling”. This lets everyone in the room know the camera is now recording. Wait two seconds, and then state “Action” – this is the cue for the on screen person to begin speaking, when they’re ready. These pauses help with the video edit time, giving buffers to make the edit easier.
- Periodically, check the remaining storage and battery levels on the camera. You don’t want to run out of video storage or battery power. If you’re recording using an iPhone, off-load video footage to a laptop long before it’s necessary. Also, bring a long cable to plug in the camera to keep it charged when it’s recording.
![]()
Tips for Students: The process of filming is exciting – and can be frustrating. This is normal. If you ever get stuck on a process, refer back to your script. And if you still need a bit more clarity, check your creative brief. You have everything you need to make it happen.
![]() Tips for Teachers: The fun begins! Remind your students that filming today is cheap – don’t have them worry about ‘getting it right the first try’ – it’s not stage acting. If a take isn’t great, they can redo it again and again, till it’s right. Encouraging confidence and relaxation for on-screen performance will likely be the biggest hurdle at this stage.
Tips for Teachers: The fun begins! Remind your students that filming today is cheap – don’t have them worry about ‘getting it right the first try’ – it’s not stage acting. If a take isn’t great, they can redo it again and again, till it’s right. Encouraging confidence and relaxation for on-screen performance will likely be the biggest hurdle at this stage.
Video Resolutions: UHD, HD and SD
You will need to choose the video quality for your project – when you record the video footage it will be ‘HD', ‘UHD' (also called 4K) or an obsolete format called ‘SD'. ‘HD' is the current video standard today (either 1080P or 720P) and ‘UHD' or ‘4K' are the newest video standards available. It is best to not film in SD if you can (explained below). If you're making this for a class, ask which resolution your instructor would prefer.
- UHD (ultra-high resolution) or “Quad-HD” video resolution come as (3840 pixels wide by 2160 pixels high). These name Quad-HD comes from the dimensions being four-times that of 1080P HD resolution. UHD and Quad-HD are often called “4K”, though the resolution of 4K is a bit wider, but it is very close.
- HD (high definition) resolutions are typically called 1080P or 720P. The large is the ‘Full HD' specification of 1080P (1920 x 1080 pixels) and the smaller HD specification of 720P (1280 x 720 pixels).
- SD (formerly called ‘standard definition’) is the oldest video format, currently phasing into obsolescence. Dating back to the year 1939, this resolution is very old and tiny when compared to HD and UHD. SD is also called 480i or 480P (640×480 pixels), and should be avoided if possible due to better formats HD and UHD being available.
Once your video is exported, your video is ready to be viewed. You can either copy it to a USB drive to transport somewhere or upload it to the Internet to be shared. Uploading to the Internet is the next portion.
How Much Storage Does UHD/4K Video Take?
UHD 4K video, due to its four-times the size of 1080P HD video (double the height, double the width) takes up more storage space on the device recording it.
- 30 seconds of 4K will take approximately ~190MB in storage space
- 1 minute will take up approx. 375MB in storage space
- 5 minutes will take up approx. 1.9GB in storage space
- 10 minutes will take up approx. 4GB in storage space
- 30 minutes will take up approx. ~12GB in storage space
If you own an iPhone with the intent of using it as a video production tool, it will absolutely be in your best interest to opt for the largest storage option you can afford. 64GB or 128GB will be a smart option to choose.
Testing, Testing, 1, 2, 3
Setup the Camera on a Tripod, and aim it at the backdrop you plan on filming. Rehearsing the shot several times will help.
- Have your on-camera subject sit on chair (or stand if needed) and looking through the camera, adjust the lighting and camera settings to get the visuals where you’d like them. Adjust the camera and on-screen subject to make the shot look like a frame of the storyboard that you’re attempting to recreate.
- A rehearsal is a very good step. Setup the microphone too and record an audio test, and play back listening through your headphones. Have your on screen actor feel confident about their delivery too. If the lighting, sound and actor are all ready – then you are ready to roll.
Shooting Time: Sound. Lights. Action

Your run-through tests are complete. The sound is good? The light is good? Then you’re good to start rolling, for real! Using the script and storyboard, start filming. It’s okay to have blunders – just redo the shot again. Go step by step through the shots until you’re done.
Point 3: Editing and Sharing your Educational Video
Editing is where the story gets told. If someone watched your video without knowing the premise, would they understand? Might the editing style and flow of the video imply it's a promotional video with a sales agenda? The Script and Creative Brief had a plan, and are important to stick to, but in the end, the video has to make sense on it’s own. Keep the end viewer in mind at all times.
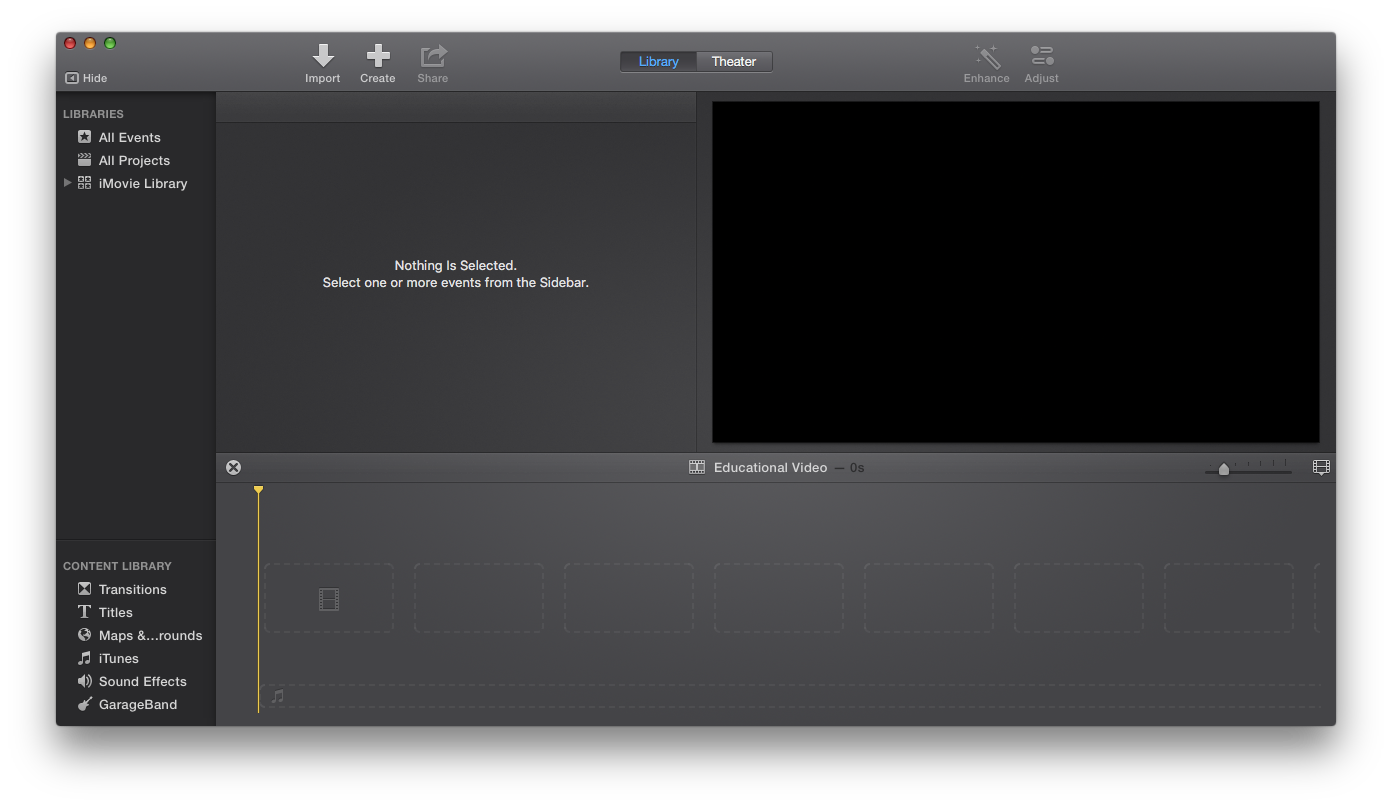
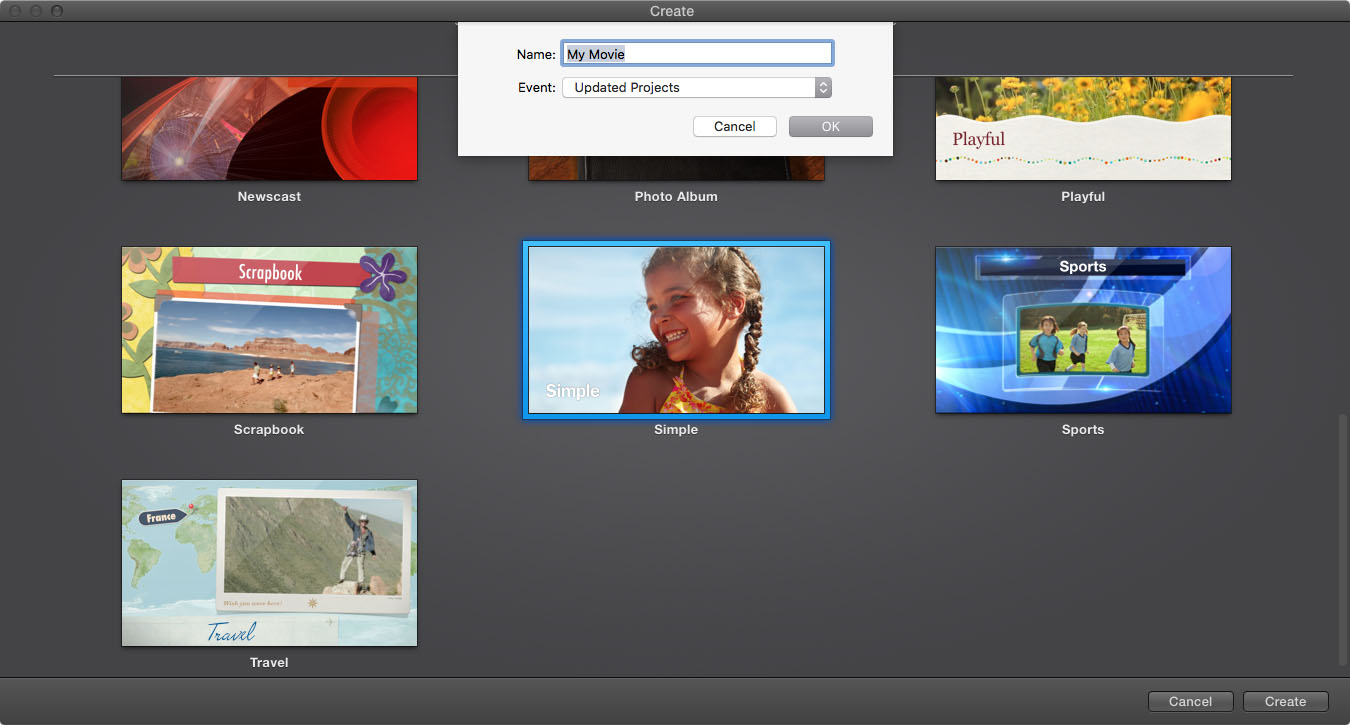
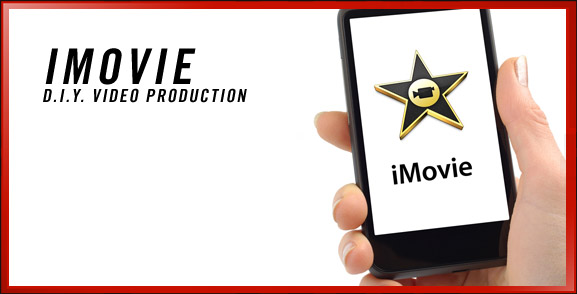
The fun part begins – the edit is where the ‘story’ is told. In your editing app, create a new project. If you’re using iMovie to edit your educational video, choose a theme for the video. Keep it simple – the focus should be on the interviews, not the fancy effect associated with an iMovie project theme. Look at other videos like yours if need be. When you’ve chosen and setup a theme, press done.
Easy Editing Apps for Educational Videos
I've used all three video editing applications below for professional work and can recommend each of them. They've got their unique benefits, and depending not the scope of your project and your experience, they each have their place. I got my start on iMovie and recommend if you're a beginner, that you do too, but if you've got access to a higher-end app and have the time and patience to learn it, it may very well be worth it.
![]() iMovie (available for macOS and iOS) – This reliable and easy to use video editing application is available for both as iMovie for Macs and iMovie for iPhones (and any modern iOS device, including iPad and iPod Touch). I personally recommend every novice gets their start with iMovie before moving onto any other application.
iMovie (available for macOS and iOS) – This reliable and easy to use video editing application is available for both as iMovie for Macs and iMovie for iPhones (and any modern iOS device, including iPad and iPod Touch). I personally recommend every novice gets their start with iMovie before moving onto any other application.
Don't underestimate iMovie program just because it has the lowercase letter “i” as a prefix; this application can edit 4K video (high resolution video) with the best of them, and features transitions, title graphics, music and sound effects standard. iMovie has been around for a long time and if used intelligently, won't detract from your video project's professionalism. The techniques you can learn and master with the app can be transitioned to any future editing app, so iMovie is the ideal choice to begin with.
Advanced Editing Apps for Educational Videos
![]() Final Cut Pro X (available for macOS) – A modern video editing application for Mac computers, Final Cut is the professional-level video option for intermediate and experienced users. An older sibling of iMovie which has been used to edit educational videos for years, Final Cut Pro X (aptly called FCP X) offers a unique interface and a powerfully designed framework to let pros edit quickly and more dynamically than iMovie. While there is a bit of a learning curve when compare to iMovie or Adobe Premiere Pro, once you get the handle of ‘how' the application is best used, the process of using it becomes intuitive and brisk. While there were initial complaints about the program when it was released in 2011, Apple has made quick work and tweaked all the problem areas to round the program out and make it a strong contender to both iMovie and Adobe Premiere Pro.
Final Cut Pro X (available for macOS) – A modern video editing application for Mac computers, Final Cut is the professional-level video option for intermediate and experienced users. An older sibling of iMovie which has been used to edit educational videos for years, Final Cut Pro X (aptly called FCP X) offers a unique interface and a powerfully designed framework to let pros edit quickly and more dynamically than iMovie. While there is a bit of a learning curve when compare to iMovie or Adobe Premiere Pro, once you get the handle of ‘how' the application is best used, the process of using it becomes intuitive and brisk. While there were initial complaints about the program when it was released in 2011, Apple has made quick work and tweaked all the problem areas to round the program out and make it a strong contender to both iMovie and Adobe Premiere Pro.
![]() Adobe Premiere Pro (available for Windows and macOS) – A powerful tool to create n educational video, Adobe Premiere Pro is an excellent video editor option from the Creative Pros, and the makers of Photoshop, After Effects and InDesign, Adobe. With a cult-like following, and rightly-so, many editors swear by Premiere Pro and it's ‘more intuitive' interface when compared to FCP X. While the debate is open to which application is ‘faster' or ‘easier' to use, there is no contending that if you wish to use a Windows PC and a Mac to swap your project between, then this is the app for you. The learning curve is likely slightly easier than FCP X initially, but if you're going to seriously considering investing in either FCP X or Adobe Premiere Pro, free trial options are available.
Adobe Premiere Pro (available for Windows and macOS) – A powerful tool to create n educational video, Adobe Premiere Pro is an excellent video editor option from the Creative Pros, and the makers of Photoshop, After Effects and InDesign, Adobe. With a cult-like following, and rightly-so, many editors swear by Premiere Pro and it's ‘more intuitive' interface when compared to FCP X. While the debate is open to which application is ‘faster' or ‘easier' to use, there is no contending that if you wish to use a Windows PC and a Mac to swap your project between, then this is the app for you. The learning curve is likely slightly easier than FCP X initially, but if you're going to seriously considering investing in either FCP X or Adobe Premiere Pro, free trial options are available.
Editing Clips in your Educational Video
Create a new project in your editing application. Next, you can start importing video clips into your project. You can preview video clips before you import them so you can decide which one is the best. Best practices.
- Editing is a Puzzle. Trim and layer clips as need be to make the story work. You may have to edit one person mid-sentence. Try it out, if it works, keep it.
- Have Fun. You can always ‘undo’ a change. Be courageous and try different flow of clips with your edits to see which works the best.
- Keep to the Plan. Have your Storyboard, Script and Creative Brief close by to refer to them as your build your edit. Let the planning you initially did guide the project. With the Creative Brief, always remember your audience and key message, and edit so those aspects make sense.
- Edit from Start to Finish. It’s best to start with the core part of your video – if it’s based around a person talking to the camera, edit that part of the video first, start to finish, so that it makes sense.
- Less is More. When editing, it’s typical to have a long video when you begin. The trick is to tell the story with as little as possible. Attention spans are short, and a video longer than 2 minutes will be difficult for most people to sit through, let alone focus on. Don’t be afraid to try removing a clip from your edit to see if it still works or not.
- Best for Last. For instance, when baking a pie, whipped cream topping is the last part to be added before a slice is served. In the same way, do not worry about titles, graphics, transitions, music or credits – these aspects come near the end of edit, once the ‘message’ is clear with the main edit. These parts are important, but come later on.
![]() Tips for Students: Editing takes time – longer than most people initially expect, and editing is part art and part science. Watching your video over and over is part of the process. If often helps to ask a friend who wasn’t associated with the planning to watch your video to see if it makes sense. Real feedback will help develop your video’s edit and make it better.
Tips for Students: Editing takes time – longer than most people initially expect, and editing is part art and part science. Watching your video over and over is part of the process. If often helps to ask a friend who wasn’t associated with the planning to watch your video to see if it makes sense. Real feedback will help develop your video’s edit and make it better.
![]() Tips for Teachers: If your class is using iMovie, have all students use the same theme for consistency. The default theme is called ‘Modern’ – I suggest you have your students use the ‘Simple’ theme because this will keep unnecessary ‘effects’ to a minimum.
Tips for Teachers: If your class is using iMovie, have all students use the same theme for consistency. The default theme is called ‘Modern’ – I suggest you have your students use the ‘Simple’ theme because this will keep unnecessary ‘effects’ to a minimum.
Audio: Music and Sound Effects
When your main edit makes sense and is nearing completion, music can help add to the mood. When used mindfully, background music and even some sound effects can be tasteful and add to the video. Be sure to monitor volume levels – music and sound should never ‘drown out’ any person speaking on camera.
Music & Sound Effects Online Resources:

There are various sources to download music – most aren't free, but if you sort through options, free options do popup. Here are a list of a few popular sources:
![]()
Tips for Students: Be mindful of music choices – most music has copyright and royalties or costs associated. If you do find a track you like, document where you found it and any information about it so you can look it up later if your teacher needs you to.
![]() Tips for Teachers: Music copyright can be an issue, even if the video is not intended for public viewing. YouTube’s software scans all videos being uploaded and may flag a video unwatchable if the software thinks it can detect a problem song. Inform students that they should leave enough time for reediting if this occurs when they upload to YouTube.
Tips for Teachers: Music copyright can be an issue, even if the video is not intended for public viewing. YouTube’s software scans all videos being uploaded and may flag a video unwatchable if the software thinks it can detect a problem song. Inform students that they should leave enough time for reediting if this occurs when they upload to YouTube.
Exporting Your Video from the App
Once your educational video is complete, it’s time to send the video from the editing program and then to upload it to the Internet. Common video formats for Apple products are .mov or .mp4 and for Windows and Android devices, .avi and .mp4 are more common.
Export at the highest resolution that the video itself was recorded in, UHD (2160P) or HD (1080P or 720P) unless there is standing reason not to (such as a low-end Internet connection limiting uploading bandwidth).
![]() Tips for Students: Once the video file has exported from your video editing application, play back the video file to make sure it works properly. Occasionally, a problem will be noticed when you’re reviewing the footage – make sure you catch an error before you do the work to upload your video to the Internet.
Tips for Students: Once the video file has exported from your video editing application, play back the video file to make sure it works properly. Occasionally, a problem will be noticed when you’re reviewing the footage – make sure you catch an error before you do the work to upload your video to the Internet.
![]() Tips for Teachers: ‘SD’ or ‘Standard Definition’ is well on it’s way to phasing into obsolescence, as the resolution is very low compared to HD and UHD – SD was the 640×480 pixel dimension of video before HD was introduced. Request projects to be completed in HD or UHD.
Tips for Teachers: ‘SD’ or ‘Standard Definition’ is well on it’s way to phasing into obsolescence, as the resolution is very low compared to HD and UHD – SD was the 640×480 pixel dimension of video before HD was introduced. Request projects to be completed in HD or UHD.
Uploading and Publishing Your Video
Online hosting is easy and free. While there are a variety of online videos hosting websites to choose from, the free option of using YouTube is often the best option due to it’s wide range of features. With YouTube, the platform plays on a variety of devices (TVs, desktop computers), and it is mobile-video friendly and allows for privacy.
Uploading your Video to YouTube:
 Step 1: Go to YouTube in your web browser: www.youtube.com
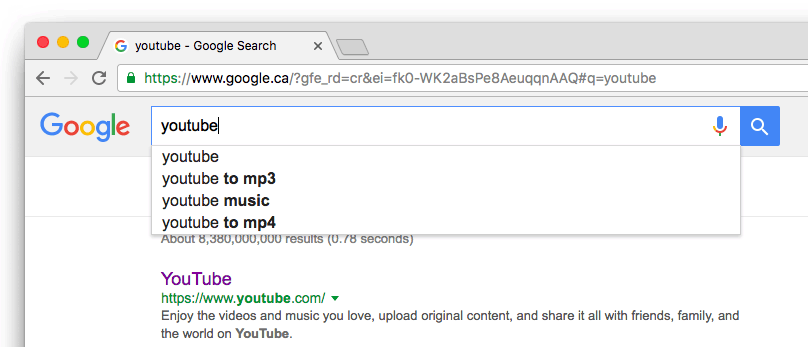
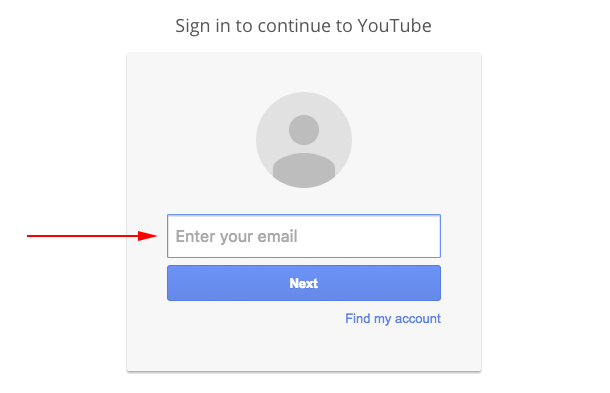
Step 2: Login using your Google account. (Create a new account if you need)
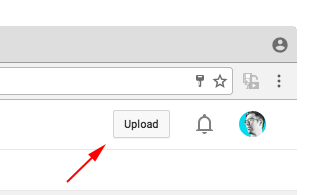
Step 3: Click ‘Upload’ button, at top right of the page
Step 4: Click ‘Select files to upload’. The page will change, and a ‘Processing’ bar will show the video uploading
![]()
Step 5: The video file will begin uploading. A progress will show the upload, depending on the file size the video, a timer will show an estimate for the amount of time the upload will take.
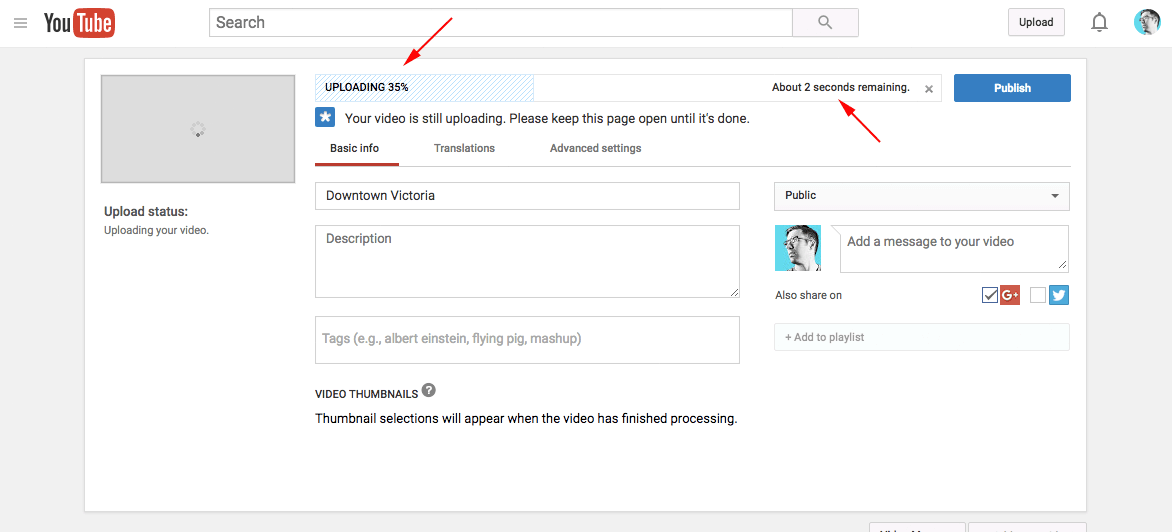
Step 6: Begin by typing into the text boxes information about the video; title, description. A title should make logical sense and use concise, regular language, but in a 140 or fewer characters. The description can be a lengthier explanation.
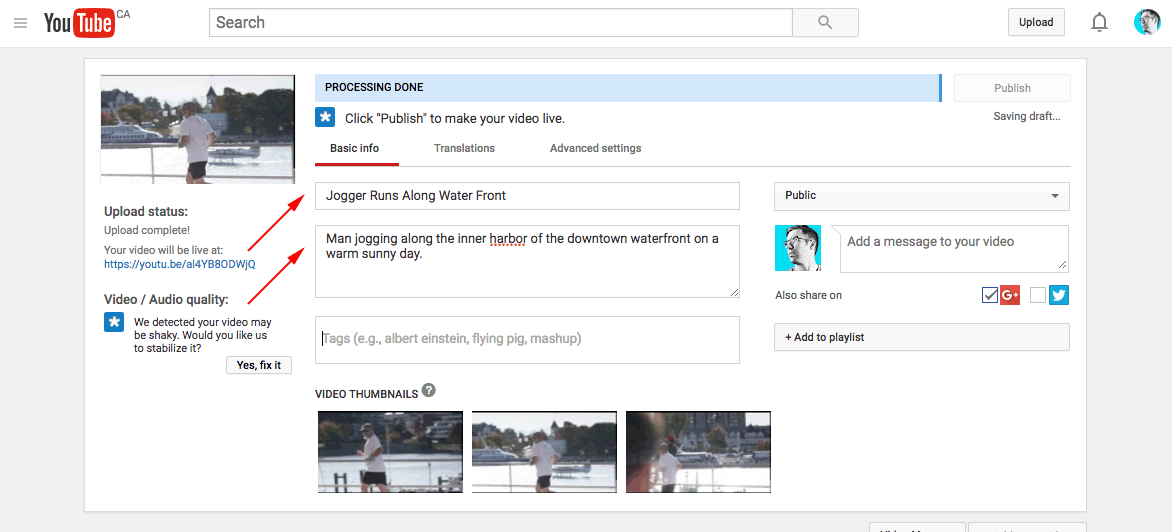
Step 7: Tags (keywords) can be one word each that are associated with the topic.
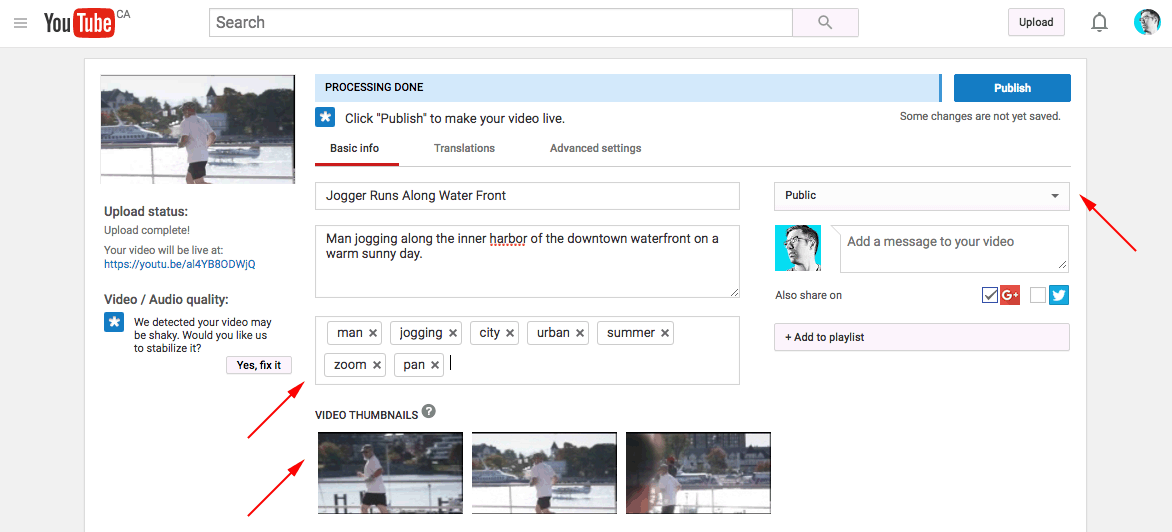
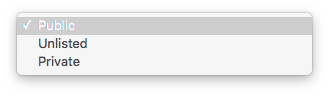
Choosing Where Video Appears: The default is ‘Public' – your video will be available to be seen by anyone viewing your public YouTube page's channel, or searching for it. ‘Unlisted' will allow people who have the direct URL only, and ‘Private' is only for you to be able to view when you login to your own YouTube account.
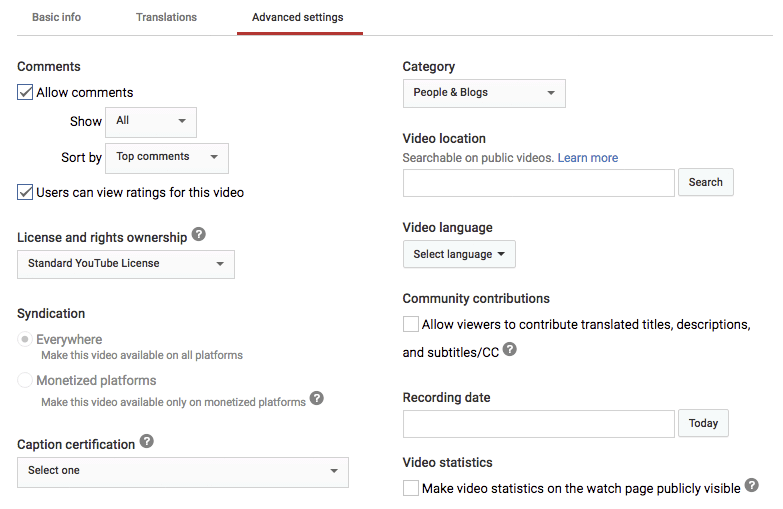
Optional Step: Advanced Settings are available – not needed, but you can enhance your video here if you wish.
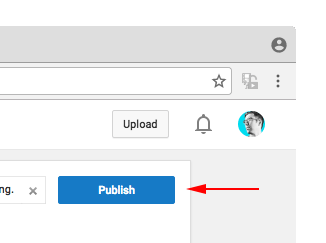
Step 8: Once the video’s progress bar is complete and you have filled in the information you want, click the ‘Publish’ to make the video now available to be viewed.
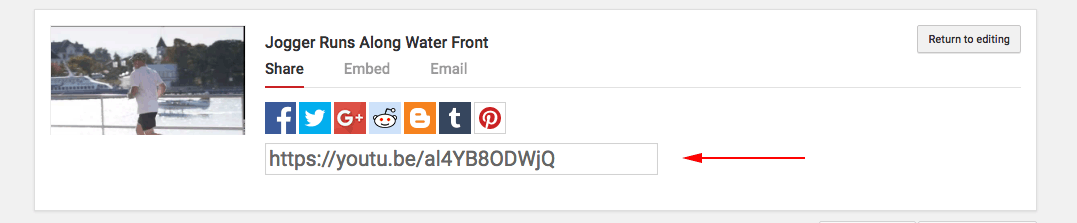
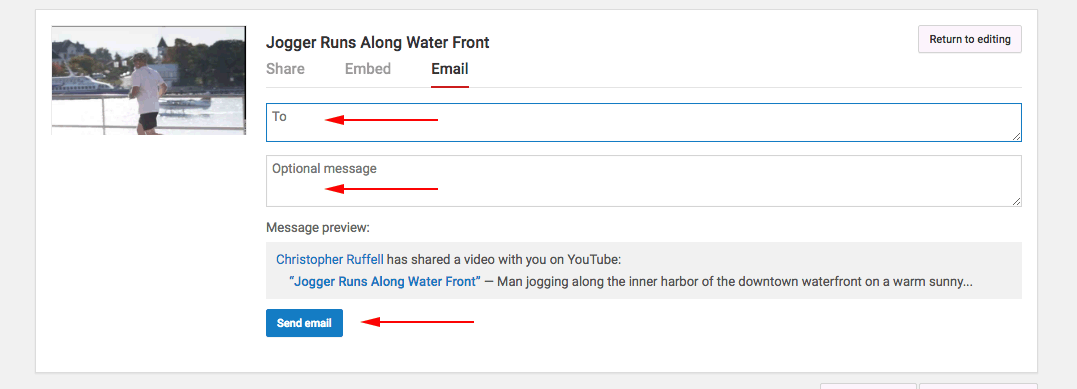
Step 9: The page will refresh – you can ‘Share’ or ‘Embed’ or ‘Email’ the video from this page. The three options in greater detail:
Share – You see a website link for the video you can copy and paste to send to people, or click on your desired social media platform (Facebook, Twitter, etc.) if you wish to share it there on your feed.
Embed – You can copy the code snippet and place it in your website to embed the video. You can define the size dimensions of the video using controls.

Email – Fill in a person’s e-mail address and a message to have a link of the video sent to them.
Some reasons not to choose YouTube may be because music, photographs or some people who you got shots of you don’t have permission to share. Ensure that you have the rights to any music, photographs, video clips, filming locations and any people you are interviewing on camera. Using waivers is an excellent way to ensure you’ve covered all the necessary steps in getting approval. If you’re ever in doubt, be sure to ask.
That’s it, your video is live! If you wish to change settings such as the name, tags, thumbnail or privacy level, you can easily visit your YouTube dashboard and click ‘Edit’ button near the video you wish to change.
Congratulations on completing your educational video!
Note about Music on Youtube: Also, some videos may encounter issues with copyright notices from YouTube. This happens because the YouTube servers ‘listen’ to the audio track of every video uploaded – if the software believes it hears a commercial song, it may flag this video. In preparation, your students can plan in advance for this – they may have to reedit the video to remove songs, or be mindful of background music playing when they’re recording their video.
Recieving Feedback on Your Educational Video
A video will always have some aspect that can be tweaked, adjusted, added or removed. Everyone will have an opinion and this is normal. It is likely you may come back a week later and have a different opinion about your work work too. This is normal! It's okay. If you have the option of adjusting your educational video, go for it, or, save the ideas and lessons you've learnt form this particular project for the next one.
![]() Tips for Students: Watch your video again and make sure it works and there are no glitches in it. To avoid the mass public from seeing your video, on YouTube, it’s possible to have a video ‘Unlisted’ – it will be available to be viewed by anyone you send the direct link to when you publish it later, but will not show up publicly on your YouTube channel, and will not be able to be seen by someone else if they search for it.
Tips for Students: Watch your video again and make sure it works and there are no glitches in it. To avoid the mass public from seeing your video, on YouTube, it’s possible to have a video ‘Unlisted’ – it will be available to be viewed by anyone you send the direct link to when you publish it later, but will not show up publicly on your YouTube channel, and will not be able to be seen by someone else if they search for it.
![]() Tips for Teachers: Suggest that students only upload their projects to YouTube, using the ‘Unlisted’ privacy setting. Next, once a student has their YouTube video on the Publish screen, have your students submit the same way – using the ‘Email’ screen. This way you’ll have everyone submitting the same way. Alternatively, have your students Embed their video on a course blog website with more info about their topic.
Tips for Teachers: Suggest that students only upload their projects to YouTube, using the ‘Unlisted’ privacy setting. Next, once a student has their YouTube video on the Publish screen, have your students submit the same way – using the ‘Email’ screen. This way you’ll have everyone submitting the same way. Alternatively, have your students Embed their video on a course blog website with more info about their topic.
Continuing The Video Process
Understanding story telling, video and the creative methods involved is an ongoing process. There is so much more you can learn if you'd like to improve your abilities, and it's such a rewarding and fun hobby, or full-time vocation, if you choose. Enjoy the process – and if you've created a video, share it down below in the comments me to see, and show others what you've done.
Cited References
- Fenesi, B., (2011); Mayer, R. E., & Moreno, R., 2003; Berk, R. A., 2009.
- Nelson, D.L., Reed, U.S., & Walling, J.R. (1976). Pictorial superiority effect. Journal of Experimental Psychology: Human Learning & Memory, 2, 523-528. Retrieved from: https://en.wikipedia.org/wiki/Picture_superiority_effect
- Kamin, C., (2015); ‘4 Huge Reasons why 4K Video on iPhone is Great for DIY Marketers' Reel Designer Magazine, Retrieved from: https://reeldesigner.com/4k-video-camera-iphone-6s-diy-marketers/
- Paivio, A. (1921); Retrieved from: https://en.wikipedia.org/wiki/Dual-coding_theory
- Gardner, H. (1985). Frames of mind: The theory of multiple intelligences. Basic books.
- Kamin, C. (2010); ‘How to Use a Creative Brief for Video Production, Template and Examples' Reel Designer Magazine, Retrieved from: https://reeldesigner.com/video-production-downloads/
- Pychyl, T., (2010) ‘Solving the Procrastination Puzzle: A Concise Guide to Strategies for Change‘, .
- Kamin, C. (2010); ‘5 Steps: How to Make a Promotional Video' Reel Designer Magazine, Retrieved from: https://reeldesigner.com/how-to-make-a-promotional-video/
- Hornung Y. (2014) ‘The optimal length for video marketing content? As short as possible’ The Next Web. Retrieved from:
https://thenextweb.com/socialmedia/2014/05/02/optimal-length-video-marketing-content-short-possible/ - Kamin, C., (2015); ‘What Video Equipment Do I Need for Any Budget Level?’ Reel Designer Magazine. Retrieved from: https://reeldesigner.com/what-video-equipment-do-i-need/
- Lazear, D. (2008). Multi-modal learning David Lazear. Retrieved from: https://www.davidlazeargroup.com/free_articles/multi-modal.html
Additional Reading: Modern Learning
- “Research Confirms Video Improves Learning Results”, Michal Tsur, (2014). Retrieved from: https://www.huffingtonpost.com/michal-tsur/research-confirms-video-i_b_5064181.html
- “Flipping the Classroom Requires more than Video”, Kevin Malice, (2012 Wired.com). Retrieved from: https://www.wired.com/2012/04/flipping-the-classroom/
- “The Keys to Adult Learning: Theory and Practical Strategies”, Lawler, Patricia A. (1991) Philadelphia: Research for Better Schools. Amazon Link to Book
- “Ideas and Strategies for Using Video in the Classroom”, University of British Columbia. Retrieved from: https://isit.arts.ubc.ca/ideas-and-strategies-for-using-video-in-the-classroom/
- “Why Personalizing Video Learning in the Classroom is Important”, Michal Tsur, (2015). Retrieved from: https://www.huffingtonpost.com/michal-tsur/why-personalizing-video-l_b_8083216.html
- “How ‘Flipping' the Classroom Can Improve the Traditional Lecture”, Berrett D., The Chronicle of Higher Education (2012), Retrieved from: https://www.chronicle.com/article/How-Flipping-the-Classroom/130857/
- “Creating an Effective Online Instructor Presence”, Community College Research Center, Teachers College, Columbia University, (2013). Retrieved from: https://files.eric.ed.gov/fulltext/ED542146.pdf
- “What Makes An Instructional Video Compelling?”, Educause Review (2014). Retrieved from: https://er.educause.edu/articles/2014/4/what-makes-an-online-instructional-video-compelling
- “A Model for Developing Multimedia Learning Projects” Frey, B; Sutton, J. (2010) Retrieved from: https://jolt.merlot.org/vol6no2/frey_0610.pdf

I was not so interested about making educational videos. But after reading the benefits that you have given, I’m inspired. 🙂
Jonathon, that’s great to hear that you’ve found the learning benefits of memory retention and engagement compelling. When you create your own educational or informational video, hopefully you can share the results here in the comments – I’m certain that other readers would like to see how you interpreted the lessons and what you made. Also, if you have any questions at all about the process, just post a question and me or other readers will be sure to reply and assist where possible. Enjoy the process!
Wow, this is so well put together, thank you Christopher. You have answered almost all of the questions I could have before I could have asked them. I am right now planning on making a video using the tools and planning you suggest. However, alas I do have a question about the types of shots you list as I prepare a storyboard. CU, MS, WS all make sense, yes, but how or when should I use each of them? Do I need to use them in one educational video?
Hi Rebecca, I am glad to hear you’ve found all this useful – it means a lot to me to have you saying this information has been helpful! Be sure to check out the great many other sources and articles I’ve linked to at the bottom, there’s a lot of smart information out there on learning and using video.
And of course, I will certainly assist how I can: You asked which shot types to use – CU (Close Up), MS (Medium Shot), WS (Wide Shot) and of course the others. I will answer in reverse:
Question: Do you need to use all shot types in a video? Answer: No, not required. Just use what is dictated for the project (which is good – you’re doing that now, planning your needs when using your Storyboard, great move). Your storyboard will show that you will likely only need a few angles for the main angle of the on-screen presenter person…
Question: When do I use the different shot angles? Answer: Usually, a video begins a bit wide, showing the location that the video is taking place in (a WS or LS – ‘long shot’). This is often called an establishing shot. Next, the camera moves in closer to a MS (medium shot) and then may move in closer still to a CU (close up) of the head and shoulders. If needed, an ECU ‘extreme close up’ of the face and nose may be needed, but that depends on the subject.
I hope this helps you and anyone else reading. I wish you success with your video project, and by all means, feel free to post any future questions here and I’ll respond.
What’s up, I check your new stuff on a regular basis.
Your story-telling sytle is awesome, keep doing you’re doing!
Hi Franklin, thanks for saying so – that means a lot, I appreciate that sharing perspectives on communication and video creation has been of interest, enough to keep you coming back. Let me know if there are any specific aspects you’d like to hear more about, and I’ll see I can help out!
Thank you for your great article! Whoa, what a great combination of ALL the resources in one place thank you.
Your layout is wicked! You definitely know how to keep a reader ‘educated’ on the topic of video and learning with the images and writing, thanks. Really cool.
Your article was… how do I say it? Relevant! Finally I’ve found an-all-in-one explanation that truly helped me. Many thanks!
Great work, excellent article you’ve got here. It’s hard to find high-quality explanations and how-to-guides on teaching difficult topics like this that actually make sense like you have these days. I honestly appreciate the descriptions, science references, research and illustrative examples here. I’ve book marked this article and I will be back!
Hey thank you for this guide. My class uses this all the time, so we notice how you keep updating it. Keep on keeping on.
Team, this is great work! Please do keep up the excellent ducation information.
Extremely helpful info specifically the closing section, I can make use of this.
Thank you Alina, the guide will keep current as new information or examples become available too. Good luck with your project.
Thankyou! This has been the most helpful post I have read so far on this topic. I feel I can get started now.
Very pleased to hear that you found this guide useful! Thank you for sharing your thoughts – it’s messages like these that make this all worth while. Let us know how your project proceeds – and if we’re missing anything, feedback would be appreciated so the right parts can be added into this guide.
Very pleased to hear that you found this guide useful! Thank you for sharing your thoughts – it’s messages like these that make this all worth while. Let us know how your project proceeds – and if we’re missing anything, feedback would be appreciated so the right parts can be added into this guide.
This information is very important for me company https://www.locutortv.com/